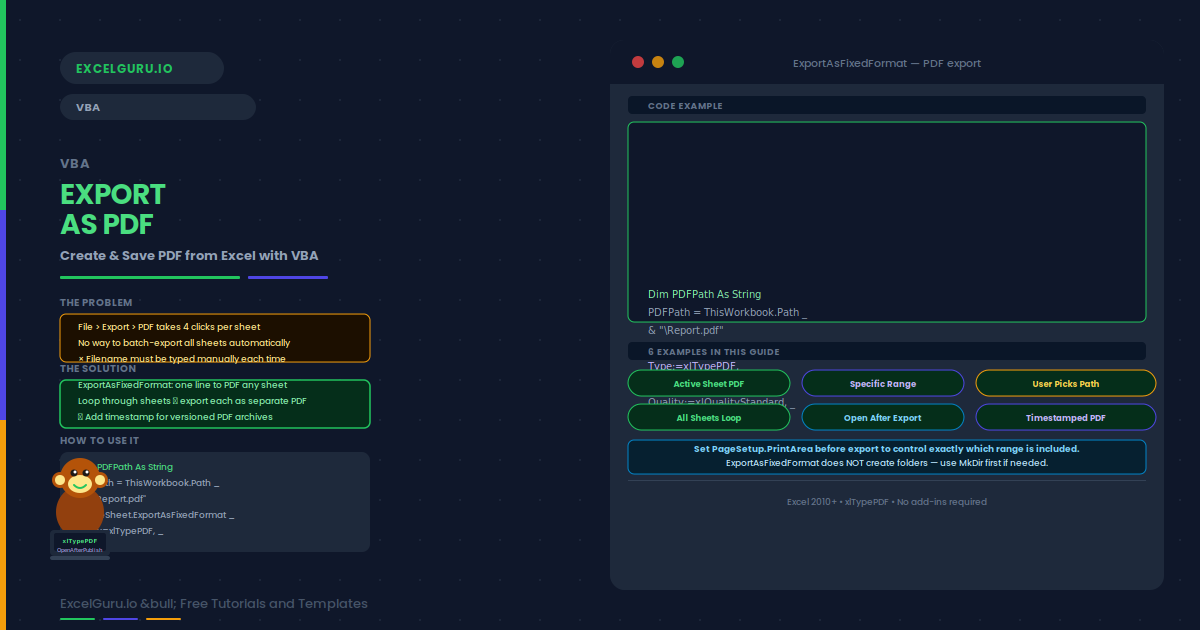
Exporting an Excel sheet as a PDF is one of the most common report-distribution tasks. VBA automates this with a single method: ExportAsFixedFormat. One macro can export the active sheet, a specific range, or the entire workbook to a PDF file — with a custom filename, quality setting, and destination folder — without opening a dialog box or clicking through the File menu.
This guide covers the ExportAsFixedFormat method arguments, six practical examples, and common issues. Examples include exporting the active sheet, exporting a specific range only, choosing a save location with a dialog, bulk exporting all sheets as separate PDFs, opening the PDF after export, and combining the export with a timestamp for version archiving.
ExportAsFixedFormat Key Arguments
| Argument | Required | Values and notes |
|---|---|---|
| Type | Yes | xlTypePDF (0) or xlTypeXPS (1) |
| Filename | Yes | Full path including extension, e.g. "C:\Reports\report.pdf" |
| Quality | Optional | xlQualityStandard or xlQualityMinimum. Standard is usually sufficient for reports. |
| IgnorePrintAreas | Optional | False = respects print areas (default). True = exports the whole used range. |
| From / To | Optional | Start and end page numbers. Omit to export all pages. |
| OpenAfterPublish | Optional | True = opens the PDF automatically after export. Default is False. |
Examples 1–4: PDF Export in Practice
The simplest PDF export uses the workbook's current folder as the destination. ThisWorkbook.Path provides the folder path without a trailing slash, so the backslash is added manually before the filename.
To export a specific range rather than the entire sheet, set the print area to that range first, then export with IgnorePrintAreas:=False. Reset the print area after exporting to leave the sheet settings unchanged.
GetSaveAsFilename opens a standard file save dialog so the user can pick the folder and filename. If the user cancels, the function returns False — so always check the return value before proceeding with the export.
This macro loops through every sheet and exports each one as a separately named PDF. The sheet name is used as the PDF filename. The PDF folder is created if it does not already exist. This is useful for month-end reporting where each sheet represents a department or region.
Examples 5–6: Open After Export and Timestamped PDF
Setting OpenAfterPublish:=True opens the PDF in the default viewer immediately after export. This is useful for a quick visual check before emailing the file. Alternatively, use Shell or the Hyperlinks.Add trick to open PDFs conditionally after a user confirmation.
Adding a timestamp to the PDF filename creates a versioned PDF archive. This is especially useful for financial reports and sign-off documents where each export should be traceable to a specific date and time. The timestamp pattern here matches the Excel archive pattern from the timestamp guide.
Common Issues and How to Fix Them
ExportAsFixedFormat produces a blank or empty PDF
This usually means the sheet has no print area set and no data in the default print range. Excel exports the print area — if that is empty, the PDF is blank. Set a print area explicitly with ActiveSheet.PageSetup.PrintArea = "A1:F30" before exporting. Alternatively, set IgnorePrintAreas:=True to export the full used range regardless of any print area setting.
Run-time error: path not found
The destination folder does not exist. ExportAsFixedFormat does not create folders automatically. Add a check and create the folder with MkDir before exporting. For example: If Dir(PDFFolder, vbDirectory) = "" Then MkDir PDFFolder. Also verify the path string does not contain invalid characters such as colons inside the folder name portion of the path.
Frequently Asked Questions
-
How do I export an Excel sheet to PDF using VBA?+Call ExportAsFixedFormat on the Worksheet or Workbook object. Set Type:=xlTypePDF and Filename:= to the full path of the output file. For example: ActiveSheet.ExportAsFixedFormat Type:=xlTypePDF, Filename:="C:\report.pdf". The method creates the PDF file at the specified path. Set OpenAfterPublish:=True if you want the PDF to open automatically after export.
-
How do I export only a specific range to PDF?+Set the print area to your target range before exporting, then use IgnorePrintAreas:=False. For example: ActiveSheet.PageSetup.PrintArea = "A1:F30". Then call ExportAsFixedFormat with IgnorePrintAreas:=False. Reset the print area to empty string afterwards. This exports only the specified range instead of the entire sheet.
-
Can I export the entire workbook as a single PDF?+Yes. Call ExportAsFixedFormat on the Workbook object instead of a Worksheet. For example: ThisWorkbook.ExportAsFixedFormat Type:=xlTypePDF, Filename:="C:\full_report.pdf". All sheets are exported as consecutive pages in a single PDF. Hidden sheets are not included unless you make them visible first.
-
How do I let the user choose where to save the PDF?+Use Application.GetSaveAsFilename with a PDF file filter. It opens a standard save dialog and returns the chosen path as a string, or False if the user cancels. Always check the return value before calling ExportAsFixedFormat — if the user cancels, the variable holds False (not a string) and using it as a filename causes an error.