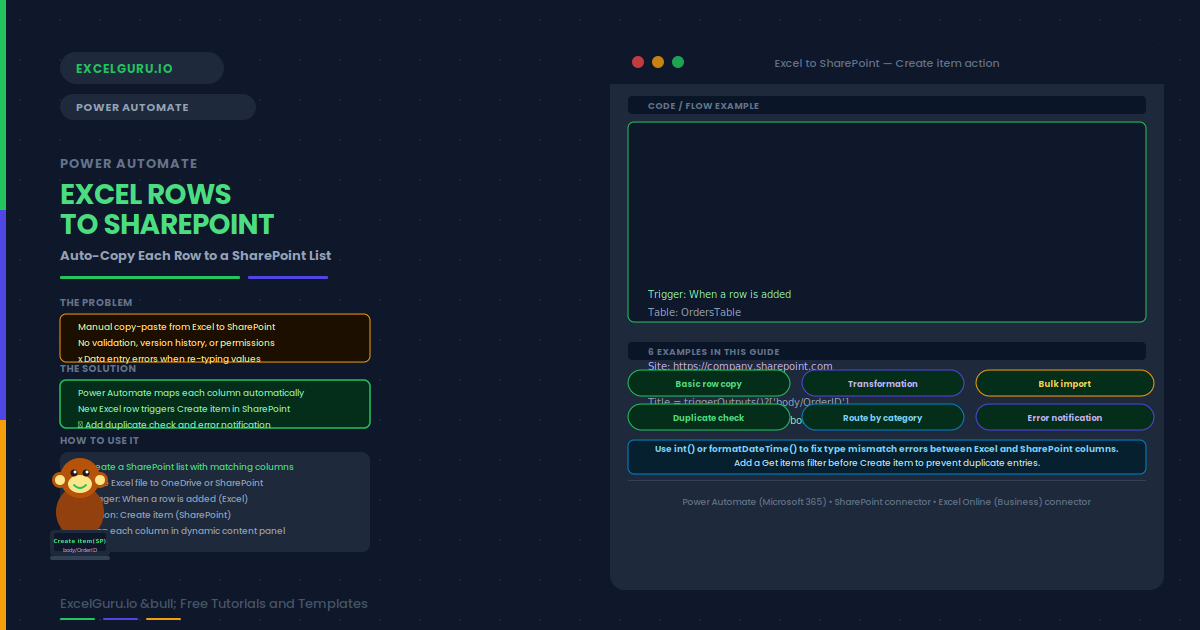
Copying Excel rows to SharePoint manually is repetitive. Fortunately, Power Automate can automate this entirely. Each new row in an Excel table triggers a flow that creates a matching SharePoint list item. Columns are mapped automatically.
This guide covers six flows: basic copy, transformation, bulk import, duplicate check, category routing, and error notification. Each example builds on the same two-action pattern.
The Core Two-Action Pattern
Essentially, every Excel-to-SharePoint flow uses two actions. The When a row is added trigger fires whenever a new row appears in an Excel Table. Then the Create item SharePoint action writes the row data to a list.
Setting Up the Flow
Before building, create a SharePoint list with columns that match your Excel table. Note that data types must be compatible: Number maps to Number. Date maps to Date and Time. Column names, however, do not need to be identical.
Examples 1–4: Copy Flows in Practice
This is the most common starting point. Specifically, each new Excel row creates one SharePoint list item. Excel Name maps to SharePoint Name. Excel Amount maps to SharePoint Amount. No transformation expressions are needed.
Sometimes the SharePoint field needs a derived value. For example, the Title field might combine customer name and order number. Power Automate expressions let you concatenate, format, or calculate values before writing them.
Note that the row-added trigger only catches new rows going forward. To import rows that already exist, use a manually triggered flow with List rows and Apply to each. Run it once to seed SharePoint. After that, the row-added trigger handles all new rows automatically.
Running a flow twice can produce duplicates. A Get items action with a filter query checks whether the Order ID already exists. If the returned array is empty, the flow creates a new item. If not, it updates the existing record instead of creating another.
Examples 5–6: Category Routing and Error Handling
A Switch action reads the Category column and routes each row to a different SharePoint list. For instance, "Hardware" rows go to HardwareOrders. "Software" rows go to SoftwareLicences. This approach sorts data automatically at the point of entry.
Power Automate can handle Create item failures gracefully. Specifically, set "Configure run after" on the next step to also run on failure. This adds a notification email with the failed row data for manual investigation.
Common Issues and How to Fix Them
The Create item action shows a type mismatch error
Specifically, a text value is being passed into a Number or Date column. Use an expression to convert the type first. For numbers, use int() or float(). For dates, use formatDateTime() with ISO format yyyy-MM-ddTHH:mm:ssZ.
The flow runs but no item appears in SharePoint
First, check the flow run history for error details. A common cause is required columns the flow is not populating. Go to the list settings and verify which columns are Required. Either supply a value in Create item or change those columns to Optional.
Frequently Asked Questions
-
Can I copy Excel rows to SharePoint automatically?+Yes. Use the Power Automate "When a row is added" Excel trigger combined with the SharePoint "Create item" action. Each new row triggers the flow and creates a matching SharePoint list item. The flow runs within seconds of the row being saved to Excel.
-
How do I avoid duplicate SharePoint items?+Add a "Get items" SharePoint action before "Create item" and filter by your unique key column. If the returned array length is greater than zero, the record already exists — update it instead. This prevents duplicates when the flow re-runs for the same row.
-
Can I import existing Excel rows to SharePoint in bulk?+Yes. Create a manually triggered flow using "List rows present in a table", then use "Apply to each" with "Create item" inside the loop. Run this flow once to seed the SharePoint list. After that, use the row-added trigger for ongoing automatic copying of new rows only.
-
Does the Excel file need to be on SharePoint for this flow?+The Excel file must be on OneDrive for Business or a SharePoint document library — not local storage. The destination list can be on any SharePoint site your account can access. The file and list do not need to be on the same site.