Converting Excel to PDF usually involves four manual steps. Power Automate reduces this to zero. It can convert an Excel file stored on OneDrive or SharePoint to PDF automatically — triggered by a schedule, a file upload, or a button press.
This guide covers how the conversion action works and six practical flows. These include a scheduled conversion, an upload-triggered conversion, emailing the PDF, a button-triggered export, a timestamped archive, and a Teams notification on completion.
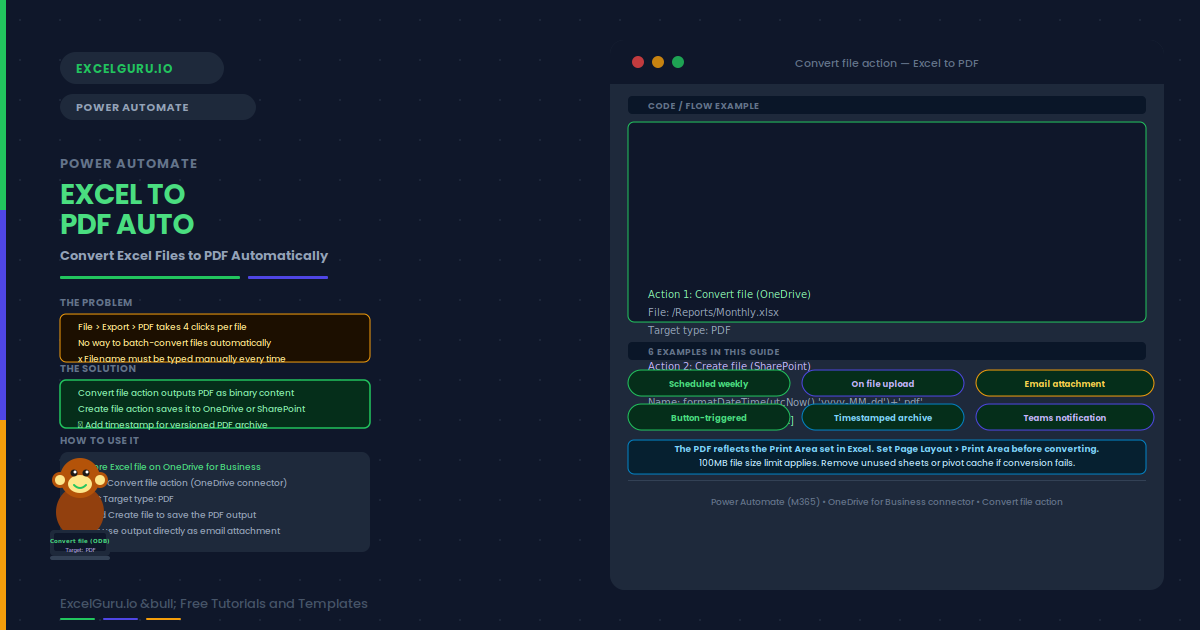
The Core Conversion Pattern
Essentially, every Excel-to-PDF flow uses the same two-action core. The Convert file action produces the PDF in memory. Then a Create file action saves it to OneDrive or SharePoint.
Examples 1–4: PDF Conversion Flows
A Recurrence trigger fires every Monday at 8am. The Convert file action converts the Excel report to PDF. Then a Create file action saves it to a SharePoint archive folder. The result is a fully automated weekly PDF archive requiring no manual effort.
The "When a file is created" SharePoint trigger fires whenever someone uploads a new Excel file. The flow then converts it to PDF and saves the result in a sibling folder. This consequently creates an automatic PDF companion for every Excel upload.
Instead of saving to a folder, this flow attaches the PDF directly to an email. The Convert file output is used as the attachment content. No file is saved to disk. This is specifically the most efficient approach for automated report distribution.
The "For a selected file" SharePoint trigger lets users run a conversion on demand by right-clicking any Excel file. This is particularly useful for team members who need to generate PDFs without navigating the Excel Export menu.
Examples 5–6: Timestamped Archive and Teams Notification
Adding a date-time stamp to the PDF filename creates a versioned archive. Each flow run produces a separately named PDF. Consequently, no previous version is overwritten, and you build a complete history automatically.
After the PDF is saved, a Post message to Teams action notifies a channel. Specifically, the message includes a direct link to the new PDF. This automatically alerts the team when the latest report is available, without anyone needing to check a folder.
Common Issues and How to Fix Them
The Convert file action produces a blank or cut-off PDF
The PDF reflects the print area defined in the Excel file. If the PDF is blank, the print area may be set to an empty range. If it is cut off, the print area may not include all data rows. Open the Excel file and go to Page Layout > Print Area to verify. Additionally, check the page scaling — Fit Sheet on One Page often produces a more complete result.
The flow fails with a file size or conversion error
The Convert file action has an approximate 100MB file size limit. Large files with many pivot tables or data connections may exceed this. To resolve the issue, remove unused sheets or split the workbook into smaller files. Alternatively, use the VBA ExportAsFixedFormat method locally instead of converting via Power Automate.
Frequently Asked Questions
-
How do I convert Excel to PDF using Power Automate?+Use the "Convert file" action from the OneDrive for Business connector. Set the File to your Excel path and the Target type to PDF. The action outputs the PDF as binary content. Follow it with a "Create file" action to save it, or use the output directly as an email attachment.
-
Can Power Automate convert only a specific sheet to PDF?+Not directly. The Convert file action converts the entire workbook based on print areas. To export one sheet, hide all other sheets and set a print area on the target sheet. Alternatively, copy the target sheet to a new workbook using VBA or Office Scripts before the conversion step.
-
Can I email the PDF without saving it first?+Yes. Use the Convert file output directly as the Attachments Content in the "Send an email (V2)" action. Set the Attachment Name to a filename ending in .pdf. The PDF is created in memory and sent as an attachment without being saved anywhere. This is the most efficient approach for automated report distribution.
-
Does the Excel file need to be on OneDrive for this flow?+The Convert file action requires the file to be on OneDrive for Business. If the file is on SharePoint, use "Get file content (SharePoint)" first to retrieve the binary content, then pass it to the Convert file action. The resulting PDF can be saved to either OneDrive or SharePoint.