
A team collects requests through a Microsoft Form, and someone copies each response into an Excel tracker by hand. The copy-paste lag means the tracker is always a few hours behind, entries get skipped on busy days, and the person doing it quietly resents the task. Power Automate removes the human from that loop entirely. You build a flow once: when a form is submitted, the response lands as a new row in your Excel table within seconds — timestamped, complete, and never forgotten.
This guide walks through the entire build from an empty flow to a working automation, explains why the Excel file must be a real Table and not just a range, and covers six practical variations plus every error you are likely to hit on the first attempt.
How the Flow Works — Three Connected Blocks
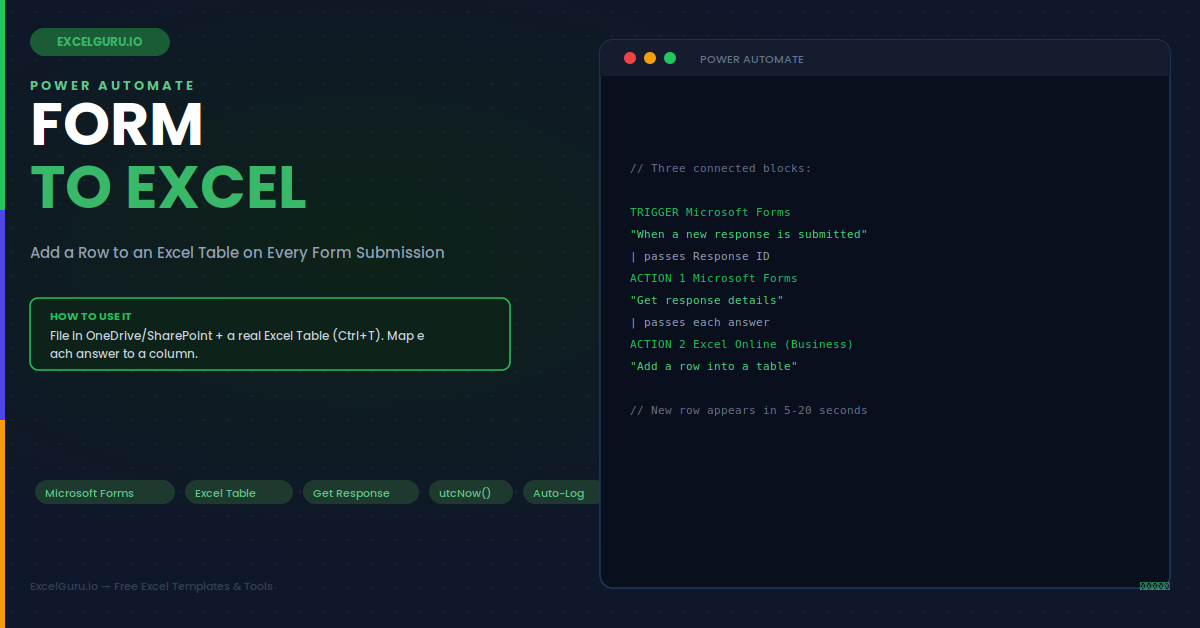
Every "form to Excel" flow is built from three blocks wired in sequence. The trigger fires on submission, the middle action retrieves the answers, and the final action writes them into the table. Seeing the shape first makes the click-by-click build much easier to follow.
Prerequisite: Your Excel File Must Contain a Table
Power Automate can only write to a formatted Excel Table, not a plain range of cells. This distinction trips up almost everyone the first time. A range is just cells with data in them. A Table is a named object created with Insert > Table that Excel tracks as a single structured entity with defined columns.
FormResponses. Power Automate lists tables by name.Example 1: The Core Build — IT Support Request Tracker
A five-question IT support form feeds a tracker. The form asks for the requester name, email, issue category, priority, and description. The Excel table has those five columns plus a "Logged At" timestamp. This is the complete, most common version of the flow — every other example is a variation on it.
In Power Automate, choose Create > Automated cloud flow. Search the trigger list for "When a new response is submitted" (Microsoft Forms). Select it, then in the trigger pick your form from the Form Id dropdown.
Click New step, search "Get response details" (Microsoft Forms). Set Form Id to the same form. For Response Id, click the dynamic content box and choose the Response Id token from the trigger. This links the two blocks together.
Click New step, search "Add a row into a table" (Excel Online Business). Set Location (OneDrive or the SharePoint site), Document Library, File (browse to your workbook), and Table (pick FormResponses). The action then displays one input box per table column.
The final action shows a box for each column. You map each one to the matching answer from Get response details. The timestamp column uses an expression rather than a form answer.
| Excel Column | Mapped To |
|---|---|
| Requester Name | Dynamic content → "What is your name?" |
| Dynamic content → "Your email address" | |
| Category | Dynamic content → "Issue category" |
| Priority | Dynamic content → "Priority level" |
| Description | Dynamic content → "Describe the issue" |
| Logged At | Expression → utcNow() |
Example 2: Add a Server Timestamp and a Status Column
Forms record their own submission time, but that value is not always exposed cleanly for mapping. Adding your own timestamp with the utcNow() expression guarantees every row is dated. Pairing it with a default Status of "New" turns the tracker into a mini workflow board where staff update the status as they work each item.
Example 3: Route by Answer — Only Log High-Priority Requests
Not every response belongs in every table. Inserting a Condition after Get response details lets the flow branch. For example, log high-priority requests into an urgent tracker and everything else into a standard one. The condition compares the Priority answer, and each branch contains its own "Add a row into a table" action pointing at a different table.
Example 4: Capture File Uploads and Multi-Select Answers
Forms can include file uploads and checkbox (multi-select) questions, and both need special handling. A file-upload answer arrives as a JSON snippet containing a link, not the file itself. A multi-select answer arrives as an array of choices. Storing them cleanly means extracting the link text or joining the array into a single comma-separated string before writing to the cell.
Example 5: Send a Confirmation Email After the Row Is Added
Once the row is written, the same flow can reassure the submitter that their request was received. Adding a "Send an email (V2)" action from Office 365 Outlook after the row-write step sends a branded confirmation. This closes the loop for the requester and cuts down on "did you get my request?" follow-up messages that would otherwise land in your inbox.
Example 6: Handle Failures Gracefully with a Retry Path
Cloud services occasionally hiccup — the Excel file might be locked by another process for a few seconds. Configuring the row-write action's retry policy, and adding a "Configure run after" fallback, keeps a momentary glitch from silently losing a response. A well-built production flow always assumes the write can fail and plans for it rather than hoping it never happens.
Troubleshooting Form-to-Excel Flows
All three problems below account for most first-run failures. Each has a clear cause and a fast fix.
The Table dropdown is empty or my table is not listed
This means Power Automate cannot see a valid Table in the selected file. First, confirm the file lives in OneDrive for Business or SharePoint, not a local folder. Second, confirm you actually created a Table with Ctrl+T rather than just typing data into cells — a plain range never appears in the dropdown. Third, if you just created the table, wait a minute and click the refresh icon beside the Table field, because the file index can lag briefly. Finally, check that the Location, Document Library, and File fields all point at the correct workbook before the Table dropdown will populate.
Answers appear in the wrong columns or come through blank
Blank or misaligned values almost always mean the mapping used the trigger tokens instead of the Get response details tokens. Delete each mapping in the "Add a row" action and re-add it, this time choosing the answer tokens that appear under the Get response details heading in the dynamic content panel. Also verify you did not reorder or rename form questions after building the flow — editing the form can invalidate the question references, showing old question IDs that no longer match. Re-selecting the current answer tokens fixes the alignment immediately.
Dates arrive as strange numbers or text
Excel sometimes stores an incoming date string as text, or displays a serial number instead of a readable date. Format the target column as Date in Excel before running the flow, so incoming values are interpreted consistently. Alternatively, standardise the value inside Power Automate using formatDateTime — for example, formatDateTime(utcNow(),'yyyy-MM-dd') writes a clean ISO date string that Excel recognises reliably. Keeping all date handling in one place, either in Excel or in the flow, avoids the mixed-format problem entirely.
Frequently Asked Questions
- Do I need a paid Power Automate licence to add form responses to Excel?+No premium licence is required for this specific flow. Microsoft Forms, Excel Online (Business), and Office 365 Outlook are all standard connectors included with most Microsoft 365 business subscriptions. The "When a new response is submitted", "Get response details", and "Add a row into a table" actions all use these standard connectors. You only need a premium Power Automate plan if you later add premium connectors such as SQL Server, HTTP requests, or third-party services that Microsoft classifies as premium.
- Why does my flow write to a Table but not a normal range of cells?+The Excel Online connector is built entirely around Table objects because a Table has a defined structure — named columns and a tracked boundary — that the connector can target reliably. A plain range has no name and no fixed edges, so the connector has no dependable way to know where to append a row. Creating a Table with Ctrl+T gives Excel and Power Automate a shared, stable reference. This is why "Add a row into a table" is the only append action available and why the Table dropdown will not list unformatted ranges.
- How fast does the row appear after someone submits the form?+In most cases the row appears within 5 to 20 seconds of submission. The Microsoft Forms trigger polls for new responses, so there can be a short delay between the click and the flow starting. Once the flow runs, writing the row is near-instant. If you need the row to appear the very moment the form is submitted with no polling delay, that is a limitation of the standard Forms trigger rather than the Excel action — the write itself is fast, and the perceived delay comes from how often the trigger checks for new responses.
- Can one flow write the same response to two different Excel files?+Yes. After Get response details, you can add multiple "Add a row into a table" actions in sequence, each pointing at a different file and table. The same answers are written to every table you configure. This is useful for keeping both a live working tracker and a permanent archive, or for feeding a departmental copy and a central master list at the same time. Just ensure each destination file contains a properly formatted Table and that each row-write action maps the same answer tokens to its own columns.