
Most VBA macros run when you click a button or press a shortcut. Event handlers are different — they run automatically in response to things that happen in Excel. A cell value changes. The workbook opens. A sheet is activated. The selection moves. You write the handler once. It fires silently every time the triggering event occurs, with no user action required. This guide covers where event handlers live, the most important worksheet and workbook events, how to prevent handler loops, and six practical automation scenarios.
Where Event Handlers Live — Module Location Rules
Event handlers must be placed in specific module types — they will not fire if placed in a standard module. The location determines which events are available. Getting this wrong is the single most common reason event handlers appear to do nothing. Specifically, worksheet events belong in sheet modules, and workbook events belong in ThisWorkbook.
Preventing Infinite Loops — Application.EnableEvents
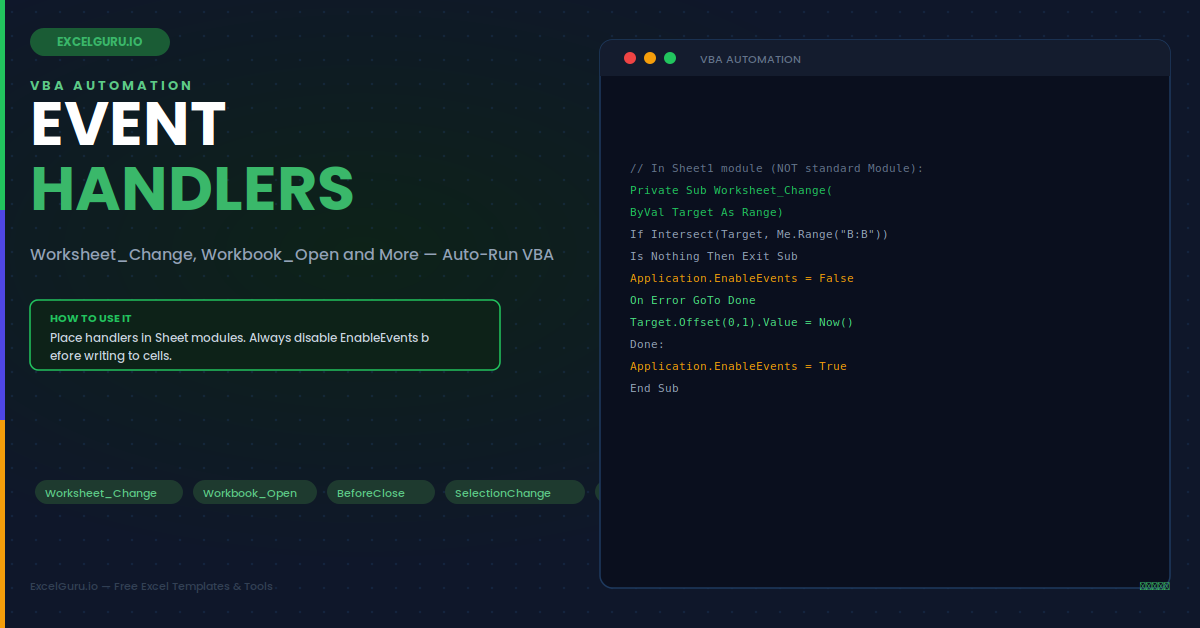
A Worksheet_Change handler that modifies cells will trigger itself. The change it makes fires another Change event, which fires another, and so on until Excel crashes. Disabling events before making programmatic changes breaks this loop. This is the most important pattern in event handler programming. Use it any time the handler writes to the worksheet or changes cell values programmatically.
Example 1: Auto-Timestamp Data Entry — Worksheet_Change
A data entry form needs to stamp the time and username automatically whenever a value is entered in column B. The Intersect check ensures the timestamp logic runs only when the change is in column B. It ignores all other cell edits on the sheet. Consequently, the timestamp is completely automatic — no button, no formula, no manual entry required from the user at any point in the workflow.
Example 2: Enforce Dropdown Dependencies — Worksheet_Change
When a user changes the Category dropdown in column A, the Product dropdown in column B should clear. The previous selection is no longer valid for the new category. Without an event handler, invalid combinations persist silently and corrupt the data. The Worksheet_Change handler detects the Category change and clears the adjacent Product cell. Furthermore, this provides dependent dropdown behaviour without complicated data validation formulas or a UserForm.
Example 3: Setup and Validation on Open — Workbook_Open
The Workbook_Open event fires every time the workbook opens, before the user sees any sheet. This makes it the correct place for initialisation tasks: refreshing data connections, checking user permissions, navigating to the input sheet, or displaying a welcome message. Specifically, Workbook_Open in ThisWorkbook is preferred over AutoOpen in a standard module — it fires reliably when the file is opened both manually and programmatically.
Example 4: Prompt or Prevent Close — Workbook_BeforeClose
The BeforeClose event fires when the user attempts to close the workbook, before the standard save dialog appears. Setting Cancel = True inside the handler prevents the close entirely — useful for enforcing that required fields are complete first. Additionally, this event is the right place to auto-save, clean up temporary sheets, or show a custom confirmation dialog instead of the generic Excel one.
Example 5: Highlight Active Row — Worksheet_SelectionChange
SelectionChange fires every time the user clicks a different cell or moves with arrow keys. This makes it perfect for row highlighting — applying a background colour to the entire active row to make wide tables easier to read. The handler removes the previous highlight before applying the new one. A similar effect is achievable with conditional formatting, but the VBA handler gives finer control over which rows and columns are highlighted at any given time.
Example 6: React to Formula Result Changes — Worksheet_Calculate
The Calculate event fires after Excel recalculates the worksheet. This includes when formula results change because referenced cells changed. Consequently, it is useful for monitoring a summary formula and triggering an alert when its result crosses a threshold. Unlike Worksheet_Change (which fires only on direct cell edits), Calculate fires when a formula's output changes because its inputs changed elsewhere — exactly the right event for dashboard alerting by value.
Troubleshooting Event Handlers
All three issues below are the most common event handler problems. Each has a specific diagnosis that takes under one minute to confirm and fix.
The event handler does not fire at all
Four things prevent handlers from firing. First, the handler is in the wrong module — Worksheet events must be in the Sheet module, not a standard Module. Second, Application.EnableEvents is False from a previous session or error — type Application.EnableEvents = True in the Immediate Window (Ctrl+G) to reset it. Third, macros are disabled — click Enable Content in the security bar. Fourth, the procedure name has a typo — use the dropdown menus in the module to insert the correct signature rather than typing it manually.
The handler fires but causes an infinite loop
A Worksheet_Change handler that writes to any cell — even a different cell from the one that triggered it — re-triggers itself. Always add Application.EnableEvents = False before any cell modification in a Change handler, and Application.EnableEvents = True after. Wrap the modification code in On Error GoTo with a CleanUp label that re-enables events, ensuring that even a runtime error during the handler body does not leave events disabled for the remainder of the session.
The handler fires unexpectedly for pasted ranges
When a user pastes a block of cells, Worksheet_Change fires once with Target being the entire pasted range. Checking Target.Row inside the handler may produce unexpected results when Target spans multiple rows. Add a check at the start: If Target.Cells.Count > 1 Then Exit Sub to skip multi-cell paste operations, or use For Each cell In Target to iterate over each pasted cell explicitly and apply the handler logic individually to each one in turn.
Frequently Asked Questions
- Where do I put a Worksheet_Change event handler in Excel VBA?+Open the VBA editor with Alt+F11. In the Project Explorer, double-click the sheet name where you want the handler — not a standard Module. In the code window, use the left dropdown to select "Worksheet" and the right dropdown to select "Change". VBA inserts the correct Private Sub Worksheet_Change(ByVal Target As Range) signature automatically. Standard Modules do not fire worksheet events — the handler must be in the sheet's own code module for it to respond to changes on that specific sheet.
- How do I stop a Worksheet_Change handler from triggering itself?+Add Application.EnableEvents = False before any cell modifications in the handler, and Application.EnableEvents = True after. This prevents the programmatic cell changes made by the handler from triggering additional Change events. Always use an On Error GoTo CleanUp structure with the re-enable line in the CleanUp section — this guarantees events are re-enabled even if a runtime error occurs during the handler body. Leaving EnableEvents = False permanently disables all event handlers for the rest of the Excel session until it is reset to True explicitly.
- What is the difference between Workbook_Open and AutoOpen?+Workbook_Open is a Workbook event handler placed in the ThisWorkbook module. AutoOpen is a Sub named AutoOpen placed in a standard Module. Both fire when the workbook opens, but Workbook_Open is preferred because it fires reliably regardless of how the workbook is opened — manually, programmatically via VBA, or as an Add-in. AutoOpen may not fire in all opening scenarios and is considered a legacy pattern from earlier Excel versions before the Workbook object model was introduced.
- How do I temporarily disable all event handlers?+Set Application.EnableEvents = False in VBA code or in the Immediate Window (Ctrl+G in the VBA editor). This disables all event handlers for the current Excel session until you set Application.EnableEvents = True. It is commonly used inside event handlers to prevent recursion, inside macros that make bulk cell changes without triggering per-cell events, and for debugging when you need to test worksheet changes without handler interference. Always reset to True — leaving it False means no events fire until Excel is restarted.